Two years ago, I made my own chinoiserie panels. While it was DIY, it wasn’t necessarily the easiest DIY project. So I wanted to challenge myself to make these panels again – without a power tool!
First, I had to find the right peel and stick wallpaper. I chose this pretty cherry blossom pattern with birds. It’s a bit metallic, too, so it catches the light quite nicely. 
After securing the wallpaper, I headed to Home Depot’s wood section. I found the same plywood that I used before, but I was also curious if they had a sheet of PVC. That could also work, if you’re able to find it, and would be a lot lighter.
Anyway, once you find the plywood, Home Depot will actually cut the plywood to size. This is why it’s important to find your wallpaper first, because you’ll want the plywood to be about 1 inch wider than your wallpaper. For mine, it was just over 20 inches wide, so I had them cut it 21 inches wide.
Once I got it home, it was time to apply the peel and stick wallpaper. I’m no stranger to this process, so I would suggest these steps:
- Lay the wallpaper on the plywood and cut it to length.
- Have someone hold the wallpaper at one end while you line the wallpaper up on the board.You’ll want to make sure you’re applying it as straight as possible.
- Peel back about 4 inches of the wallpaper and tack it down to one end, ensuring you’re keeping it straight.
- Keep peeling it back bit by bit and applying it, moving down the board.
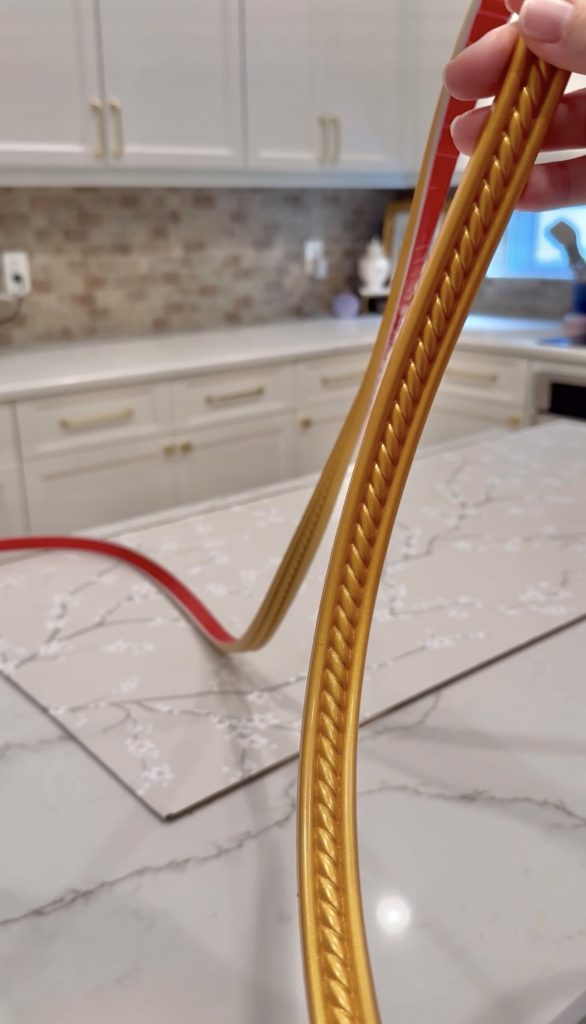
Once the wallpaper is applied, it’s time to add the moulding. I was pleasantly surprised to find this pretty gold moulding that we could cut without a power saw. Even better, it has a really sticky backing, so we’re able to adhere it to the board quickly and without glue or nails.
First, lay the moulding along one side of the panel and mark the end of the panel on the moulding. Then, I also add a line to indicate the direction I want to cut the moulding for a mitered corner. (Like a picture frame, where two corners meet at a 45 degree angle).
To cut the moulding, I used miter sheers. These are so easy to use. Just line up the moulding along the 45 degree line and clip down, like you’re using a pair of scissors. It cut the moulding so cleanly. Repeat on the second end. 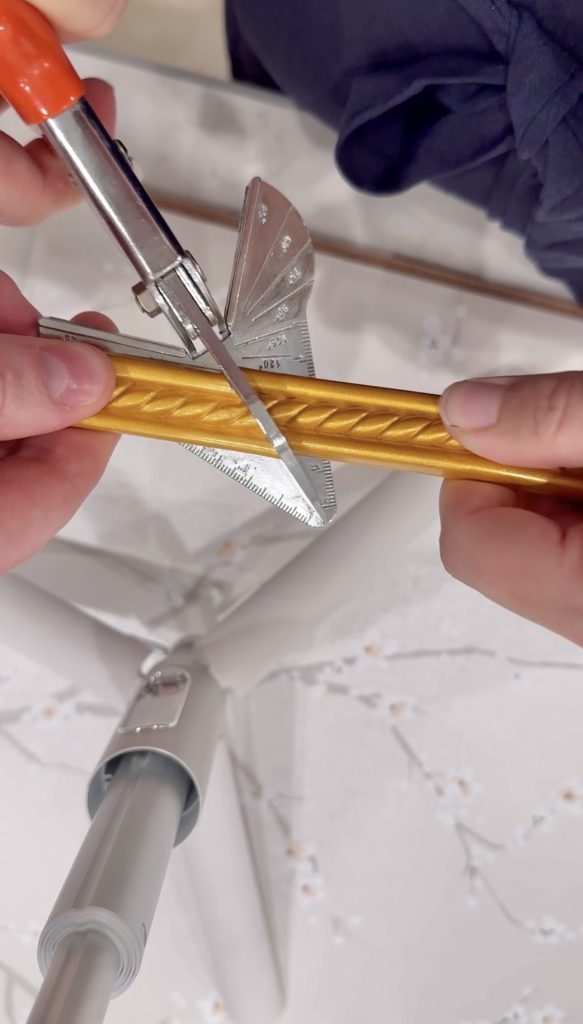
Apply your moulding along the edge of the panel, peeling back only a few inches at a time. The adhesive is really strong on this moulding, so you don’t want to accidentally place it somewhere it shouldn’t go.
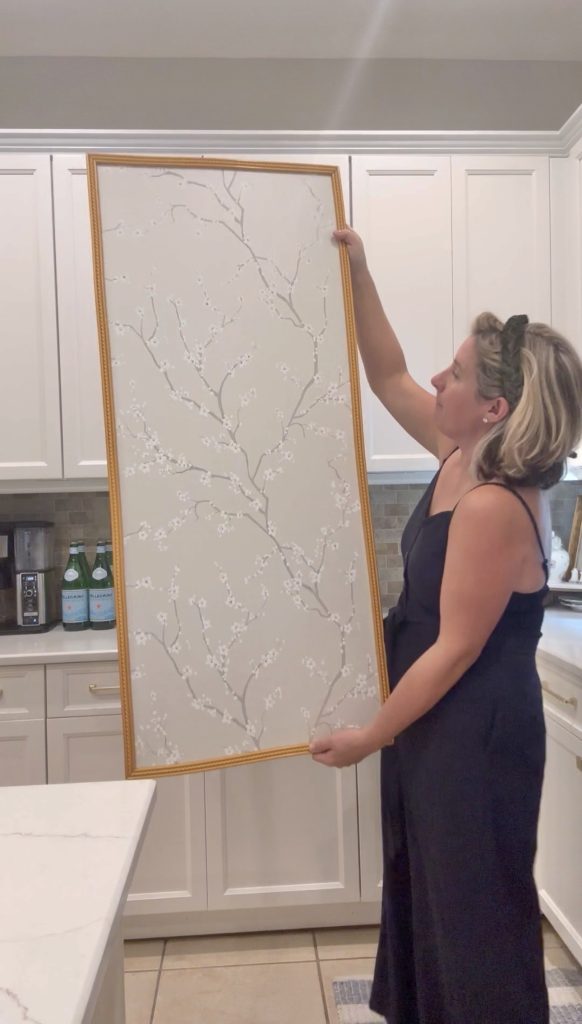
Continue making cuts and applying until you have moulding around all four sides.

Next, I’ll add picture hooks on the back so I can hang this on my wall, but I’m so impressed with how this turned out! Who needs power tools?

@classicallyjill for my grandmillennials, this is the easiest DIY for chinoiserie panels! #grandmillennial #chinoiserie #chinoiseriedecor #coastalgrandmother ♬ original sound – Classically Jill